Showing posts with label Projects. Show all posts

Wednesday, May 9, 2012

Cute SuitCase


 Hey everyone! Today is my day over at The BugBytes. Stop by Pams Blog to see my project as well as so many other talented projects!

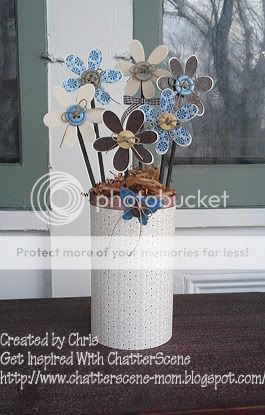
 Today I have this cute suitcase I wanted to share with you!


I used my Silhouette Cameo to make this adorable suitcase.
The cut file of the Suitcase was purchased in the Silhouette store.
Its by Lori Whitlock.
3d_box_C01735_20509
5/08/2012
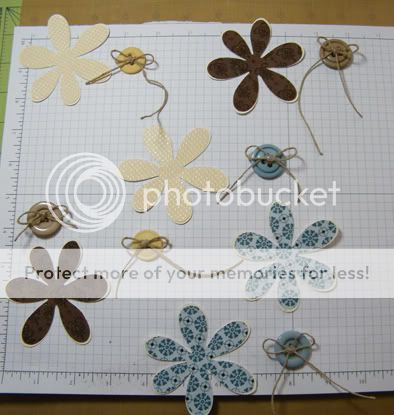
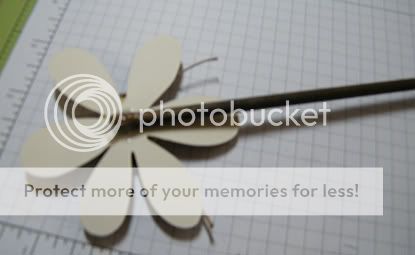
The cut file of the flower is from the silhouette store too!
Its by Sweet Afton.
flower_C00012_24282
12/27/2009
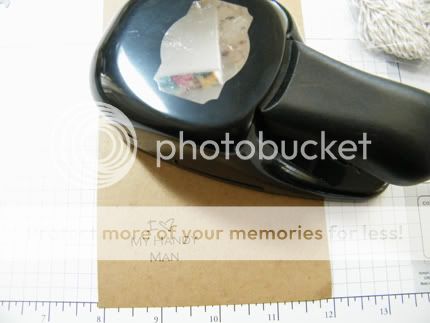
I printed the sentiment on my computer.
And punched it out with a SU punch.


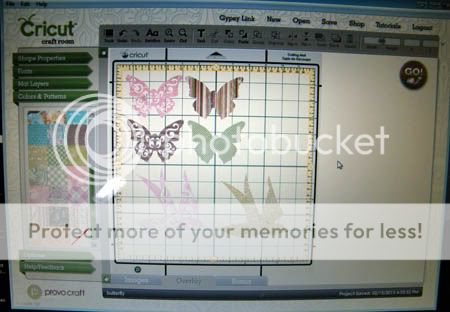
First I opened the files in my Silhouette  Software and arranged them the way I wanted to.


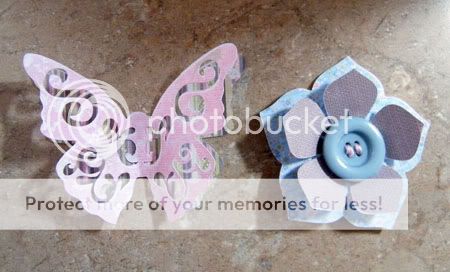
Then Cut them out on double sided paper.


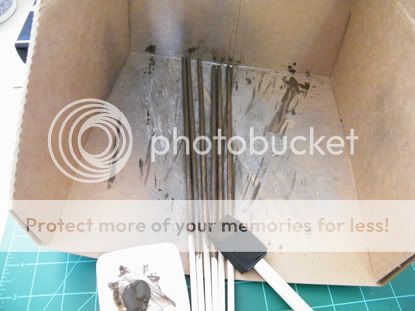
Glued the suitcase together.


Decorated with marker and stickles.

Then I glued the file and sentiment to the suitcase.


Ty for looking:) 


Also dont forget to stop by tomorrow for the winner of Just Elements 3 and to see the new Just Elements challenge.

Also I am still waiting on the winner of the Crafty Me blog hop to contact me. Please see that post.

And if you havent already stop by The Irish Scrapper and My Scrap Escape blogs I just redid and give them some love!

Looking For My 700 Follower Giveaway!! Click Here!!
Looking For My Message Boards!! Click Here!!


Don't forget to subscribe by email to keep up with challenge/giveaway posts winners!

Wednesday, April 11, 2012

Handy Man Book Mark

Looking For My 700 Follower Giveaway!! Click Here!!
Looking For My Message Boards!! Click Here!!


Good Morning! Today's project is my Design Team post for The BugBytes! Thank you again Pam for having me! Hope you all check out all the fabulous projects on Pam's Blog!

My Hubby has been bugging me for weeks for a book mark. So for my project this month I whipped up a book mark for him. I had strict rules to make it masculine with no girly to it at all...lol


It is a simple but cute bookmark:)
I used my Silhouette Cameo to make it.

First I created the book mark and the tools in the Silhouette Designer Software.

The bookmark is from the Silhouette Store.
bookmark_basic_shapes_1_C01051_18816
5/19/2011 by Loni Harris
The Tools are from the Silhouette Store.
tools_C00373_20509
1/27/2010 by Lori Whitlock

I cut everything out! 
Inked up the book mark and the tools. And Assembled them.


Stamped my sentiment and punched it out. Inked the edges.
The Stamp is from Pink By Design's Stamp Set Tool Time.

Then I added the the sentiment, tools, twine, button, and decorative tool to the book mark.


I actually had a lot of fun making it:) And he loved it! 
Ty for looking:) 


Don't forget to subscribe by email to keep up with challenge/giveaway posts winners!

Tuesday, April 10, 2012

Planet Earth Krafty Girls Challenge

Looking For My 700 Follower Giveaway!! Click Here!!
Looking For My Message Boards!! Click Here!!

Good Morning Friends!

It's time for another Krafty Girls Challenge!

Our challenge was to create a card, scrapbook layout, 3D object, or home decor project that has an Earth Day theme or has something on it that's been recycled. Hop on over to the Krafty Girls Blog and join in on the fun! I can not wait to see what each one of you creates!

For my project I decided to make my youngest a t-shirt to wear to school on Earth Day.


I used my Silhouette Cameo to make this t-shirt!
I used the print and cut feature of the cameo. I was a bit timid to try it at first but it was pretty easy. I made my design in the Silhouette Designer Software. Took Iron on paper and told the Cameo to print it on my printer ( had to tell it to print registration lines too). Then I transferred my printed image to the cutting mat and told the cameo to cut!  

The cute trees and mushroom image is from the Silhouette store.
The image is by Valerie Foster - cute_trees__mushrooms_pc_C00307_19414 
9/15/2010 

The recycled heart is from the Silhouette Store.
The image is by Sarah Bailey - recycle_heart_symbol_C00968_20508 
2/10/2011

The font I used was one from my computer. 

Thank you for stopping by.

Don't forget to subscribe by email to keep up with challenge/giveaway posts winners! 

Tuesday, March 27, 2012

For Peep's Sake! Krafty Girls Challenge

Looking For The Cameo Blog Hop Go Here ( I have some blog candy at bottom of that Post)
Looking For My 700 Follower Giveaway!! Click Here!! ( Win a cricut Cart! )
Looking For My Message Boards!! Click Here!!

Good Morning! 

It's time for another Krafty Girls Challenge! The challenge this week is to Create a card, scrapbook layout, 3D object, or home decor project for Easter. Be sure to stop over there and enter your Easter project into the challenge! I can not wait to see what you all make!

I had a lot of fun doing this project! 

For this project I used my Silhouette Cameo.
The SVG file is from MY Scrap Chick.

Dont forget to stop by Krafty Girls and enter you Easter Project into the challenge.

I wanted to thank the Krafty Girls for having me be apart of the Design Team this Quarter.
It has been so much fun! 

I am also entering my cute little bunny into the following challenge:

Stuck On You Sketches --- Die Cut Challenge Bunnies

Looking For My 700 Follower Giveaway!! Click Here!!
Looking For My Message Boards!! Click Here!!


Don't forget to subscribe by email to keep up with challenge/giveaway posts winners!

Wednesday, March 14, 2012

Flower Arrangement


Good Morning Everyone!  Today is my first post for being on The Bugbytes Design Team. I was very honored when Pam asked me to join in! TY so much Pam for having me!

Today I have to share with you a cute flower arrangement I made to display on my front porch.


 I had saved some oatmeal containers because I had seen a project in a magazine for Valentine's day using them. Well I never got around to using them in February so I brainstormed another way to use them. I had been wanting to put a cute decoration on our front covered porch so I decided to use it to make it.

I covered it in paper. And filled half way with Kitty Litter.

Created my cut outs in the Cricut Craft Room.
 

The flowers were cut from the Cricut Cartridge Accent Essentials.
The Butterfly is from the digital Cricut Basics in the craft room.
Flowers cut at 3. Butterfly at 2.25.

Here is my paper button buttons I chose to use

I painted some white dowels with brown ink.


Assembled all of my pieces

I arranged each flower into the kitty litter ( holds the sticks up great ) and then filled it the rest of the way  with shredded paper. Tied ribbon and hemp around top and added butterfly.


Thank you so much for looking:) Hugs!


Looking For Krafty Girls Challenge Post!! Click Here!!
Looking For My 700 Follower Giveaway!! Click Here!!
Looking For My Message Boards!! Click Here!!


Don't forget to subscribe by email to keep up with challenge/giveaway posts winners!

Wednesday, February 29, 2012

Spring Wreath


Good Morning Everyone!

I am very honored to be guest designer today over at She's A Sassy Lady.  Thanks Sheila for having me again!


I am so ready for spring so I decided to make a springy project!


For this project I used my Cricut Imagine.
I used two cartridges. Cricut Imagine Blossom and Cricut Sophie Cartridge.

These are the supplies I used. I ended up adding a SU ribbon to the mix that isnt shown in the 
photo.


I went into cricut craft room and flood filled flowers, butterflies, and bird using the Sophie and Blossom 
cartridges. 

Assembled the items with some cute buttons. 

Wrapped the circle with the ribbon.

And then glued the flowers, butterflies, bird, and bow to the front of the wreath.


Thank you so much for looking. 


Looking For My 700 Follower Giveaway!! Click Here!!
Looking For My Message Boards!! Click Here!!


Don't forget to subscribe by email to keep up with challenge/giveaway posts winners!

Friday, January 13, 2012

Valentine's Day Gift Jar


 Good morning everyone. I hope everyone has a great day today!

 I was honored to be guest post again over at She's A Sassy Lady. Thank you Sheila for having me again this month!

 For todays project I put together a cute little Valentine's Day jar. I had a lot of fun doing this project. 


First I started with an old peanut container. I peeled off the label and ran it through the dishwasher.


I then took some Stampin Up paper and cut it at 7x4 so it would wrap around the jar half way.


Then I opened up my Cricut Craft Room.  


The bug is from the Cricut Cartridge Simply Charmed. And the scalloped circle is 
from the Cricut Craft Room Basics digital cartridge.
The bug and its layers I cut at 3 inches. The scalloped square I cut at 3.25 inches.
I used a red ink around the scalloped square. 
And black ink and red chalk to draw in the face ( I hid the contours of the face when cutting it )


After glueing the paper to the jar I took my pink ribbon and wrapped it around
having it meet in the front of the jar. Taped it in the front and then glued the the scalloped square 
over it. I then took a couple of 3d pop dots and added the cute love bug to the front.
Took another piece of the pink  ribbon, some read thread, and a red button.
Created the bow and then glued on the side.
Then I added some glitter to his antennas and his heart. 
The lid on the jar I took off white ribbon and glued it around the jar.
And then added the finishing touch of the red thread and button to the lid.
I then added some fun Valentine's Day candy to the inside:)


Thank you so much for checking out my post here at She's A Sassy Lady.
Hugs
Chris


Looking For My 700 Follower Giveaway!! Click Here!!
Looking For My Custom Blog MakeOver Page!! Click Here!!
Looking For My Message Boards!! Click Here!!


Don't forget to subscribe by email to keep up with challenge/giveaway posts winners!

Saturday, December 10, 2011

Christmas Ornament


Happy Saturday

Today I just wanted to share quickly an ornament I did using the 3d ornaments digital from cricut.
And I wanted to share with you another completed blog:)


The ornament is from the exclusive 3d ornaments digital cartridge in the CCR.


Here is the latest blog I finished.
Stop by and give her some love:)

I actually have another to share too but she isnt debuting it until after the holidays. So I will post again once it is up on her blog:)


Ornament entered into challenge -- http://especiallymade.blogspot.com/p/weekly-challenge.html


Looking For My 500 Follower Giveaway!! Click Here!!
Looking For My Custom Blog MakeOver Page!! Click Here!!
Looking For My Message Boards!! Click Here!!


Don't forget to subscribe by email to keep up with challenge/giveaway posts winners!

Sunday, November 20, 2011

Christmas Train Frame

Happy Sunday

I hope everyone is having a great weekend so far.

Today I wanted to share with you all a Christmas Train Picture frame:)

This project took me days to complete and I was not as happy with the end results as I had hoped to be.

I used a couple of cricut cartridges to make the project.


I used the cricut craft room to make it:)

The trains are from the B Is For Boy Cricut Cartridge. I did cut the train a bit different by using hide contour to hide some parts that I did not want on the train. And I grouped a square in three places so it would cut out a spot for the pictures.
I used cereal box in the middle and coved both the front and the back with heavy card stock.
I flood filled the train with colors from the Mr. Frosty Imagine Cricut Cartridge.

I cut the track using Cricut Pop Up Neighborhood cartridge and flood filled it with a basic black.
I cut the tracks four times and glued all four pieces together to give the tracks some dimension.

The tree is from The Give A Hoot Cricut Cartridge. Flood filled with basic colors. I also cut several layers of card stock to make the tree sturdy.
The hills in background is from the Give A Hoot Cartridge too:)

I mixed glitter and flock together and applied it on the tree, the hill, the ground, and the tracks to give it a snow like effect.

Added some embellishments and I was done.

Oh I also cut white card stock and bent it slightly on one side. Glued the hill to it and the tracks and stuff so that the frame would stand up on its own.

It was a lot of fun to try something different but I am not 100 percent pleased at how it turned out. But definitely a learning experience and I hope each time I try something different it comes out better each time.

Thank you for stopping by and taking a peek:)


Looking For My 500 Follower Giveaway!! Click Here!!
Looking For My Fall Challenge!! Click here!!
Looking For My Custom Blog MakeOver Page!! Click Here!!
Looking For My Message Boards!! Click Here!!


Don't forget to subscribe by email to keep up with challenge/giveaway posts winners!

Thursday, October 27, 2011

Kim's Halloween Blog Hop

Hi everyone:)

Thank you for stopping by for the Halloween Blog Hop. If you just stumbled across my blog go back to the beginning at Kim's Blog. We have a lot of talented hoppers and some cool blog candy so you wont want to miss any of the blogs. For a full blog hop line up see end of post.

I made these for my youngest' preschool class.


I used the cricut cartridge Mini Monsters. I cut it at 5 inches.
The sentiment is from Scrappy Moms Bewitched Stamp Set.
Instead of using the eyes that cut I used googly eyes.

And now for some blog candy.

You must be a follower of my blog and comment on this post to win.
Please leave a way to contact you.
For a second chance to win post about our blog hop on your blog and come back here and let me know you did in another comment.
US only.


I have an Extra Triple Play set From CTMH that I earned that I am giving out for blog candy.
It is new and never been opened.


I will announce the winner October 31st and you will have until November 1st to get back to me.

Your next stop is the Talented Tracy @ My Scrap Escape - http://myscrapescape.blogspot.com/ .
Have fun hopping.

Looking For My 500 Follower Giveaway!! Click Here!!

Don't forget to subscribe by email to keep up with challenge/giveaway posts winners!

Kim @ Kimberli's Creations - http://www.kimberliscreations.blogspot.com/
Chris @ Get Inspired With Chatterscene - http://chatterscene-mom.blogspot.com/ ( you are here )
Tracy @ My Scrap Escape - http://myscrapescape.blogspot.com/ ( go here next )
Maria @ Creative By Design - http://marlm-creativebydesign.blogspot.com/
Susan @ Cricut & Grasshopper - http://cricutandgrasshopper.blogspot.com/
Renee @ I Came, I Saw, I Created - http://icameisawicreated.blogspot.com/
Dana @ Paper Memories 4 U - http://papermemories4u.blogspot.com/
Lori @ Got 2 B Crafting - http://got2bcrafting.blogspot.com/
Crystal @ Creations By Crystal - http://crystal-kovach.blogspot.com/
Sis @ Paper, Craft, and Scissors - http://papercraftscissors.wordpress.com

Wednesday, September 7, 2011

Preschool and crayon wreath

I hope you all are having a great day:)

My youngest started preschool and despite his constant "I will not like it" and "I dont want to go" we arrived there and he love it. At first he wanted to hide near me but once they pulled out the trains he ditched me and didnt look back. He just loves trains..lol


I saw a crayon wreath project on my friends blog and just had to make one up myself for a gift for the teacher at preschool. Or should I say teachers...lol There are a lot of them.


I used the cricut cartridge DoodleCharms to make the Bus and the Apples. The bus was cut at 3 and the apples at 2 1/2.
I had to get creative and hang the other 4 teachers names off of the wreath.
I used 6 inch and 8 inch hoops. And left over card stock and ribbon.

Here is the link to Kim's Blog where I saw the project.


Today is my nine year olds first day and then my 15 year old starts Thursday.
So I hope to have more projects posted regularly now:)

Stay tuned for my 500 follower contest announcement.

If you are interested in getting a remake Check out myCustom Blog Design page.

Wednesday, August 24, 2011

Out Of This World T Shirt


I hope everyone is well:)

I wanted to share a T-shirt I made using the Cricut Craftroom and my Cricut Imagine.


The rocket ship is from the Blast Off Cricut Cartridge.
The font is from the Robotz Cricut Cartridge and flood filled with the Cricut Imagine Blast Off Cartridge.


Related Posts Plugin for WordPress, Blogger...

My Etsy Shop

Please Feel Free To Share!

Contact Me

Name

Email *

Message *